Inky Moose On Facebook

Find me on Facebook where you can get inspiration, class updates and other crafty goodness!
Showing posts with label Thank You. Show all posts

Saturday, July 18, 2015

You're Golden!


Hello again and happy Saturday :D
I hope your weekend is an enjoyable one so far!

Today I want to share one of the projects for my upcoming 'Over The Rainbow' class. You'll be making four cards and a coordinating satchel to put them in.

I used the super sweet new stamp set 'Over The  Rainbow'. I can see I'll be using bits from this set a lot!

Thanks for stopping by and taking a peek :)

Tuesday, July 7, 2015

Thank you!


Happy Tuesday :)

I wanted to share some thank you cards I  made yesterday. I first saw this idea on Pinterest by Sarah Poulton and tweaked it a little. Thanks for the inspiration Sarah! :D

Sometimes less is more and that's definitely the case with this card. I'm really happy with how they turned out :)

The Colours I used are 'Mint Macaron', 'Soft Sky', 'So Saffron' and 'Bermuda Bay'.
I used the new thick Whisper White cardstock for the card base. I LOVE it. No more flimsy card bases!

Thanks for stopping by and taking a peek :)

Monday, June 29, 2015

'Timeless Elegance' Class


Hello all and happy Monday :D

Here are the three projects for my upcoming 'Timeless Elegance' class.

The card in the front is a latch card. a fellow demo Sandi Ross showed me this idea and I loved it. The circular flower image is the latch.

Thanks for stopping by and taking a peek :)


Class Details:

Wednesday 8th July, 7 - 9.30pm
Thursday 9th July, 7 - 9.30pm

Cost:

$20.00

Email to register.

Wednesday, September 24, 2014

Birds Of A Feather


Hello and happy Wednesday!

Today I'm sharing one of the cards I made to include with customer orders this month.
I went for a monochromatic look using the 'Four Feathers' stamp set and coordinating framelits.
A simple card but I really like it!

Thanks for stopping by and taking a peek :D


Thursday, September 5, 2013

In Shades Of Blue and Green


Happy Thursday all!

Thanks for stopping by and taking a peek at my creations :)

I recently made some Thank You cards for some friends and this is one of the cards I made it accompany them.

'Chalk Talk' and 'Flower Shoppe' were the stamp sets I used and my colour palette consists of Pacific Point, Island Indigo, Bashful Blue and Lucky Limeade.
 I love the freshness of these colours together. I've noticed this week the leaves are starting to change so this is a last hooray to Summer before we begin to bundle up!


* I've been asked how I did the four flowers on the Thank You card. I actually hand cut around the edge to remove the pieces I didn't want. Thank you for your comments and questions! :D

Wednesday, August 14, 2013

Gee, Thanks!

Happy Wednesday :)

I've got another upcoming project to share with you today. It's one of the projects for my 'Best Of Flowers' class.
Again I've used the 'Smoky Slate' and 'Blushing Bride' combo. These colours are just so pretty together.
I've added some dry embossing and piercing, and a wee bit of ribbon for a bow.
Simple, sweet and delicately soft!

This week I have been busy working on the first of my Christmas card class projects (I know, I said "that" word!). I have new goodies as well as some retired favourites in mind for my Fancy Pants Christmas "kick off" class. Stay tuned as I will start posting pics in the coming days!

I am also working on ideas for my 'All Day Christmas Class' too and once I have a date confirmed I'll share it with you. I'm going to be busy!


Sunday, July 28, 2013

So Very Thankful


Happy Sunday :)

I apologise for not posting for a while.  My constant companion and furry friend was hit by a car last weekend so she has been my number one priority. She has had her surgery and is now home with us recovering. She has a long way to go but cuddles with loved ones are a strong medicine :)

This card is perfect for how I'm feeling... so thankful for all the wind words and support we have received and so thankful my friend is still here.

Oh, there's also a sneak peek of a product from the upcoming mini catalogue!
Enjoy :)

Thursday, July 26, 2012

Thanks, From My Heart

Happy Thursday :)
Today I'm sharing a recent swap I made for a ASI challenge. We were to choose a card in a magazine and recreate it using SU! products.
This is the card I came up with.
I used my favourite set from the new catalogue (From My Heart) and teamed it up with some retired DSP (You'll see why I choose it when you look at the card I choose to case), some paper piercing (mmmm) and some of the scrumptious Early Espresso embossing powder.
I pleated the strip of Rose Red DSP though you can't notice it very well in the pic.
Here's the card I chose to case...
I think my card is a little different to this but it still resembles the overall layout of it.
It was a great challenge ladies and I'm really pleased with how my swap turned out!
Thanks for stopping by and taking a peek :)

Thursday, January 5, 2012

Some 'Wheel'ly Nice Cards

I know it's a cheesy title for the post but I couldn't help myself!
Today's post is all about wheels. Not the sort you find on vehicles ... the ones you find in a stamping room!
I'd been asked about a class using the SU! wheels and here it is.
The card above uses the music note wheel. I wanted to give this card a theatrical feel so tried to make the front look like a show programme with tickets. The music notes were also rolled on the envelope and the inside of the card...
I love the music note wheel. It is great to add some interest to a background and works for all kinds of occasions. I love using it on vintage cards also.

Next up is a card using a jumbo wheel. It's the 'Wedding Words' wheel in the new mini. I have rolled it with Versamark ink and heat embossed it. I've used the new heart Embosslits also to complete the romantic feel.
Here's a close up of the sentiment...
The three roses to the left are handmade so you'll learn how to make these in the class. Because the roses are bulky, a handmade envelope is required. Not to worry though, here's one I made earlier ...
A perfect fit!

Lastly is a card using the 'Take A Sip' wheel. I had to get this wheel when I first saw it... it's all about tea and anyone that knows me, knows I like tea!
This is the inside of the card. The little pocket is big enough to put a teabag in! I love it! Just the thing to "perk" someone up when they aren't feeling the best.

Class Details:
Wednesday 25th January / Thursday 26th January 2012, 7 - 9.30pm
Thursday 26th January 10 - 12.30pm
Cost: $18.00, email me to reserve your spot!

Sunday, July 17, 2011

A Little Thread, A Button or Two...

Happy Sunday!
Here's some of what I have been up to this weekend. I am currently trying to fill my box of cards I have down town in the Artisan's Case Mate store (If you haven't already you have to check it out. There are some amazing creations!). I have sold quite a number but have been so busy that I haven't really had a chance to replenish supplies.
For this card I really went to town (or to the haberdashery store LOL). I hand stitched the buttons on and wound real thread around the cardboard spool. I even hand stitched the thread on the pink sentiment panel...
I know... crazy, but I wanted the card to be special with such a cute sentiment. I know someone will see it in the store and love it.
Here's what I did on the inside...
I had the sentiment stamp made for me and cut the letters out with a die. To finish it all off I covered the flap of the envelope too.
Thanks for taking a peek!

Thursday, April 28, 2011

Thanks Sew Much


Another Thank You card... this is yet another customer thank you card I recently made. When I was a little girl I remember pinking shears - special scissors that cut the edge of fabric in the diagonal pattern you see around the squares on the cards. Those scissors were the inspiration for this quick and easy card. Add some piercing with stitches and you have a card fit for any sewer!

Wednesday, April 27, 2011

Spring Fever

Mother birds with nests brimming with baby chicks all mean Spring to me. Not that I see many of them in my back yard (I can hear them though!) but for me the thought of them conjures up the essence of Spring.
This is a Thank You card I made for customer orders a wee while ago. I used the Bird and Branch punch, using the branches to fashion a nest. I went out of my comfort zone and tried Peach Parfait with Early Espresso. Two colours I wouldn't have thought to combine normally but I like the mix. I've used Natural White as my neutral to minimise the brightness that you tend to get with Whisper White. A simple card but don't you think it's tweet!

Wednesday, April 20, 2011

I Got a Telling Off!


Not really! But over the weekend we had our ASI team get together. I got to meet the newest member of the team ("Hi Louise!") who is just like the rest of us so we had a ball!
While there we were discussing blogs and on a couple of occasions it was said that people visit my blog to see what I have been up too but it isn't updated. That's my telling off. I have to confess to hearing this before and these people are right... when I visit other people's blogs, I like to see something new. So, I am going to try and post something new every day (Yes I know... what am I getting myself into... but they won't all be my creations!) so when people visit my blog they have a happy experience :)
So here we go, my "first" post...

Since we have a new team member I thought I would show you the cute wee cards fellow team member Sandi made as a welcome to the team gift.
There is a little story behind this gift...
When the ASI team was first created, founding member Linda made a beautiful box with cards in it for the then newest member Sandi ("Hi Sandi!"). It was to welcome her to our team. Sandi always remembered that as as such wanted to do the same for Louise. Isn't that sweet?! I told you I am part of the best team of ladies!!! The sharing and generosity and fellowship never fails to inspire me.
So Sandi made a welcome gift for Louise. I just can't believe I didn't get a photo of the beautiful box they came in though!!! I was busy eating lunch and it slipped my mind. You'll just have to believe me though when I say it was beautiful!
These are some of the cards that were inside. They are so pretty. I have a hard time choosing which one I like the best!
So there we have it, my first blog. Phew!
Opps, one more thing to do... "Hi Carol!" ;)
Thanks for stopping by and taking a peek.

Wednesday, June 23, 2010

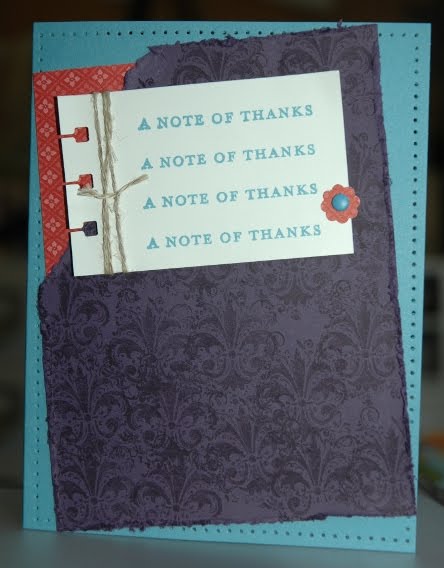
Simply ... Thank You


Here's a card I whipped up to give to as a thank you. I really like the colour combo so am going to have to remember it for future reference.
I played around with the front piece trying to choose between lining everything up straight or slanting some of the sections. Thought I'd be daring and go for a bit of a slant. I wonder whether I should have left the sentiment section straight but by the time I thought of it, it was too late as I had already stuck it down!
I've used Elegant Eggplant, Ruby Red (retiring but I can use another gorgeous red instead) and Marina Mist (I can see this is going to be my favourite new colour). Stamp sets are Extreme Elements and Thank You Kindly. My Stamp-a-ma-jig came in handy with lining up the sentiments!

I'm on the home stretch now with only a few gift boxes to make. I'll post one set I have made already. Enjoy!

Tuesday, March 30, 2010

PPA 35 - Anything BUT a Card Challenge


I always love the 'Anything BUT a Card' challenge at PPA especially if I have a project on hand. This coming weekend is my DD's and my last ice skating lesson and I wanted to make something to thank our very patient and wonderful teachers. What's the big deal I hear you say, most Canadians take ice skating for granted. Learning to ice skate was a huge deal- having just moved here from NZ means we don't, (where there are only two ice rinks in the whole country!) and believe me, I NEEDED lessons!! My DD's took to it like a duck on water but I was one of "those" students. Needless to say, a pretty Gift Box Thank You was in order.
These baskets are made using the Big Shot 'Fancy Favour' die. You cut away part of it to create the lower front. Pretty cool huh?! Not my idea though. My wonderful Up line shared it as an idea she had seen at Leadership convention and I just had to try it. Each basket holds two milk cartons snugly and don't they look ever so cute?

Supplies: All SU! except for ribbon scraps - Fancy Favour Big Shot die, Beautiful Butterflies die, 'Sprinkles' stamp set, 'Thank You Kindly' stamp set, Boho Blossoms punch, Scallop Border punch, 1/16" Circle punch

Monday, March 29, 2010

Butterfly Thank You's


I like to give each person that places an order with me, a wee Thank You note card to show my appreciation. I use a Post-It sticky note on the inside so the recipient can reuse it if they wish.
I try to make something different each time and these are my latest creations. I am just "tickled pink" (excuse the pun!) with how they have turned out. Let me know what you think! :)

Supplies:All SU! - 'Great Friend' stamp set, Designer Series paper and a variety of pink inks.

Saturday, February 13, 2010

For the Wonderful Carol!


My wonderful Upline Carol is just so lovely. Recently we had a workshop at her house and I had the best time. She is so encouraging and supportive and I wanted to send her a Thank You card to let her know how much I appreciate her and her efforts.
This is the card I came up with. It's a bit hard to see but I have used one of the tree tops in the 'Trendy Trees' stamp set, to create my own background designer paper for the large teal square. I love being able to create my own unique paper this way. To make the smaller scallop square to accentuate the main image, I just punched out four small SU! scallop squares and joined them together. The seams are hardly noticeable.
I have made the triangular portion of the card many times before but wanted to do something a little bit different for Carol. I added the large Scallop Square but then needed a way to make the card stand up for display. What I came up with is an easel time stand (see below). I thought I was pretty clever coming up with this. Often I see an idea I like and alter it to suit what I am doing, but this I came up with all on my own and I did a little dance of joy when it turned out. It's not often I come up with something I can call original!
I sent the card and haven't posted it until now, just in case Carol visited my blog and saw it. The card has been delivered so here it is for all to see.
So, thanks once again Carol. You really are wonderful :)