Inky Moose On Facebook

Find me on Facebook where you can get inspiration, class updates and other crafty goodness!

Thursday, September 29, 2011

A Scenic Season Glittered With Gold

Happy Thursday people :)
This week has flown by and I haven't had a chance to post on my blog until today. I do have a beautiful card to share though, so I hope it makes up for it!
This is a card I created over the weekend at my wonderful upline Carol's place when we had our ASI team meeting.
I don't have this stamp set and have been looking at it for a while in the catalogue. I decided to borrow Carol's set and see what I could come up with.

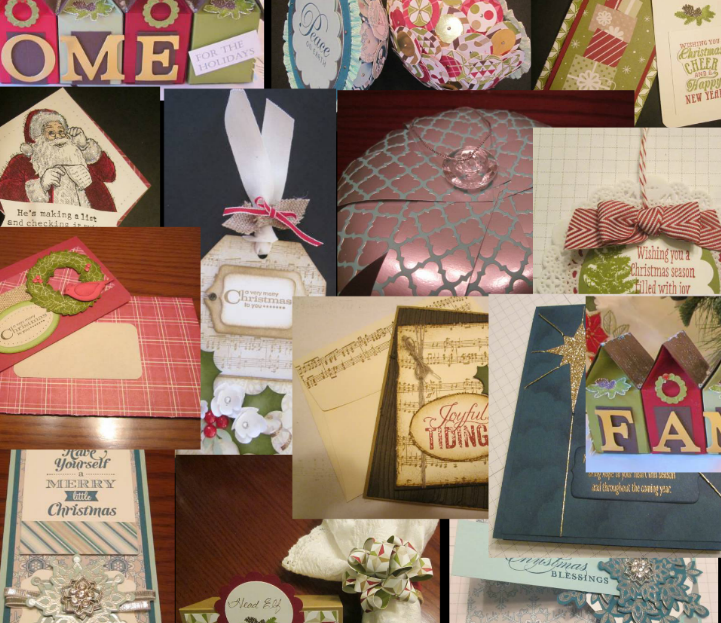
I first stamped the image in Versamark and heat embossed it with white embossing powder. I then sponged the light effects around the trees and sponged the skyline. I Versamarked the sentiment next and heat embossed it with gold powder. It is difficult to see but the trees have gold embossing on them also. I'd like to say this was intentional but it wasn't... I forgot to use my static cling before heat embossing with the gold powder and some stuck to the trees. At the time I was so disappointed but I thought I would heat it anyway and see what happens. The trees took on a golden, glittery tone that is so striking in person. I'd call it a happy accident LOL...
I then mounted my top note piece onto the Brushed Gold card stock I never knew existed until last weekend I don't know how I could have missed it in the catalogue because it is gorgeous!!!
Add some delicate Baja Breeze seam binding, Not Quite Navy DSP and card stock. Add pearls and adhere to a card base of River Rock.
And there you have it, a scenic setting glittered with gold. Thanks for stopping by and taking a peek!

Monday, September 26, 2011

Home Grown and Handmade

Everybody knows someone who gardens. Whether it be yourself, a family member or a friend. This class is inspired by those of you with a green thumb.

I've taken a rectangular metal DVD tin and decorated it. Inside you'll find 4 cards, envelopes and even a pen (you can just make it out above the cards)...
I've used the 'Home Grown' stamp set and used each vegetable on a card...
My favourite image would have to be the Artichoke but I do like them all.

Do you have someone in mind for this handsome 'down to earth' gift set? If so, sign up for the class today!

Dates: Wednesday 19th October / Thursday 20th October, 7 - 9.30pm

Cost: $20

Email me to reserve your spot.

Thursday, September 22, 2011

Pretty Princess Punch Art

Punch art was our ASI team swap for September. There are some truly amazing ideas out there using punches (I don't know how people come up with them!!!) and I had quite a job picking just one to do for the team.
When I came across this cutie, I couldn't resist. What little girl (or big girl for that matter) doesn't want to be a princess for a day?!
The punches I used to make her highness were: Owl punch (dress, arms, heart), Boho Blossoms (Hair and crown) and 1/2, 3/4 and 1" circles.
I embossed one of the new Designer Frame folders, cut around it and added a piece of Whisper White card stock to it. I've used Concord Crush and Blushing Bride to complete my girly girl (and royal) creation.
Here's a closer look at the princess:
Isn't she darling? I think she is :) My DD's even gave their seal of approval so she must be pretty good!


Sunday, September 18, 2011

A Little Pat On The Back

Happy Sunday all!
I want to share a little pat on the back I received a couple of days ago.
I was lucky (or should I say talented?) enough to be chosen as one of Tiffany Bauer's Crafty Picks of the week.
How exciting is that?!

What is the Crafty Picks of the week?
Here's Tiffany's description:
"Welcome to My Crafty Picks. This is a weekly post where I showcase oherether pieces of art made using Stampin' Up! product that have inspired me in one way or another. These inspirations are created by other talented artists so please visit their site for all the details and let them know that I sent you!!"

Here's what Tiffany had to say about my KAPOW Colour Challenge card...
"OMG!!! This card totally rocks!! I love it and will be featuring it on My Crafty Picks #34"

Awwww thanks Tiffany for the kind words and honour. You made my day.

Want to check out the other crafty picks of the week, then click here to head over to Tiffany's blog :)

Friday, September 16, 2011

KAPOW Kreative Challenge - KKC01

It has been a while since I have done a challenge and yesterday I thought to myself, I really need to take myself out of my comfort zone and do some challenges. I came across this colour challenge and decided to give it a go.
All I can say is it definitely took me out of my armchair!!! The colours to use were: Poppy Parade, Island Indigo, Old Olive and Wisteria Wonder. I have worked with three colours before but that fourth colour was making my head spin LOL.
My card took me all afternoon to make but here it is...
After a LOT of humming and harring I chose one colour as my focal point. I chose Poppy Parade as it is so striking.I punched out flowers with one of the itty bitty shapes. I was going for a love theme and the flowers reminded me of the crosses when you write "xox".
I was happy with how the heart turned out but I realised I hadn't added any Wisteria Wonder. That colour really threw me. In the end I went for a Wisteria Wonder brad (LOVE the new brads) and card base. Phew, I managed to squeak it in there!
Thanks Carrie for a challenge that really took me out of my comfort zone!

Thursday, September 15, 2011

Is It A 'Holly Jolly Christmas' Or 'LOL'?

Happy Thursday people :)
Today I have a card to share that I made while visiting my wonderful upline Carol a few weeks ago. Carol is the Queen of Christmas (It's her favourite time of year) so check out her blog for some beautiful Christmas inspiration.

I have used lots of new goodies on this creation ... I've used the 'Letters To Santa' DSP. This was my first project using it and I have to say I like it. Nice colours and designs to work with.
Another first time goodie was the awesome 'Peek-A-Boo Frames' die for the Big Shot! Aren't the windows adorable?! I just love them. They remind me of the Advent Calendars you get that house a chocolate behind each window, but you could use them for any occasion. I have some more ideas with these cute frames to try out so I'll post them when I have made them.
The other newcomer on the block is the beautiful Cherry Cobbler quilted satin ribbon. It is so nice to work with and ties easily (always a good thing especially for those that are bow-phobic!).
Inside my windows I coloured stamps from the Holly Jolly Bingo set with my markers. I stamped the same image on the front of each window too but just in Old Olive ink. Now this is where the "LOL" part of the post comes in...
I had finished making the card and was sitting admiring it (as you do!). One of my DD walks in and asks to see what I have made. I hand DD the card and the first thing she says is "Why have you put LOL on a Christmas card?". (For those of you that don't have a teenager to explain what LOL means, it is text language and stands for 'Laugh Our Loud').
I take my card back and look for myself...
Hmmm, loooking at the card from a different angle, I can see what DD means. A candy stick, followed by a wreath and a candlestick does kind of look like 'LOL'.
So there you have it. A dual purpose card. One you could give to your older (less technologically savvy) family and friends, or one you could give to a teenager to show them how hip you are with the lingo (or not as the case may be!).
Thanks for taking a peek :)

Saturday, September 10, 2011

Sweet Stockings For October

Hello all!
Stockings in October I hear you say?! Don't I know stockings are for December...
Well yes I do know stockings are for December, but these stockings are for my October Inky Moose Christmas Club card.
I've used the co-ordinating stamp set and punch from the new Holiday Mini and teamed it with Pear Pizazz and Real Red card stock. I've used the latest addition to my stamp sets (Merry Christmas in French) for those ladies that have French family and friends to send cards to. I think the sentiment looks so sweet in French! (Not to worry those ladies that don't have a need for French Christmas cards, I have the same set in English for you!).
Want to make some of your own stockings in September? Cards are $2 each.
When you register, let me know how many cards you'd like to make on the night.

Dates: Wednesday 5th October / Thursday 6th October, 7 - 9.30 pm.

Email me to reserve your seat!

Thursday, September 8, 2011

Welcoming Fall

Happy Thursday people :)
It's been a busy week with the kids back at school and setting up routines again.
When I took my youngest DD to the bus stop I noticed the changing leaves and realised Fall (or Autumn as I call it) has come our way. Fall is my favourite season so I made this card to announce it's arrival.
I used some of the new goodies from the Holiday Mini. I kept the card really simple with only a few embellishments. I water coloured the image and cut it out. Yes it did take a while but I had seen it in the new Mini and loved the effect. I hand stitched (yes with a needle and thread) the stitching on the very Vanilla card stock.
The card base is textured 'More Mustard' card stock. I rarely use the textured stuff but I do like it. It means I can add a little "something something" without having to stamp or find some matching DSP. I did use a small amount of the new 'Spice Cake' DSP under the image but not my usual amount.
Here's a close up...
Thanks for taking a peek!

Saturday, September 3, 2011

Sweet Childhood Memories

A new mini catalogue means lots of new goodies to play with!
I just love this Holiday mini... there is so much to choose from. I'm going to have to be very good so Santa brings me everything I'd like!
When I had my first peek at the new mini, the number one item on my list was the new Stocking punch with it's co-ordinating stamp set.
It is just too cute not to get.
This weekend I have been using it to create an upcoming class. While I was looking at all the wonderful ideas people have come up with it already, I came across this one from Jackie. Thank you Jackie for sharing it with us!
Seeing Jackie's creation brought back sweet childhood memories for me and I just had to make a Hobby Horse of my own. This is what I came up with...
How cute is that?!!! I LOVE it. I actually made it as part of an order but I am going to have trouble parting with this one. I knew I should have made two of these just in case!
Here's a closer look of the details on the horse...
Cute, cute, cute...that's all I can say!
Thanks for stopping by and taking a peek, and whatever you have planned for this Labour Weekend, I hope it's a good one :).